Connect to your robot
Everything is already installed 🎉
Reachy comes with a Raspberry-Pi 4 dedicated to its control. When you receive your Reachy, the board is pre-installed with all required softwares. So, you don't have to install anything on your computer.
This section is meant to:
- let you know how to connect to the Raspberry-Pi,
- give you a bit more information on how things are actually working.
First, you can find the Raspberry-Pi inside the trunk of the robot, as shown on this picture below. If you need to find or re-flash the SD-card, that's where you will find it.
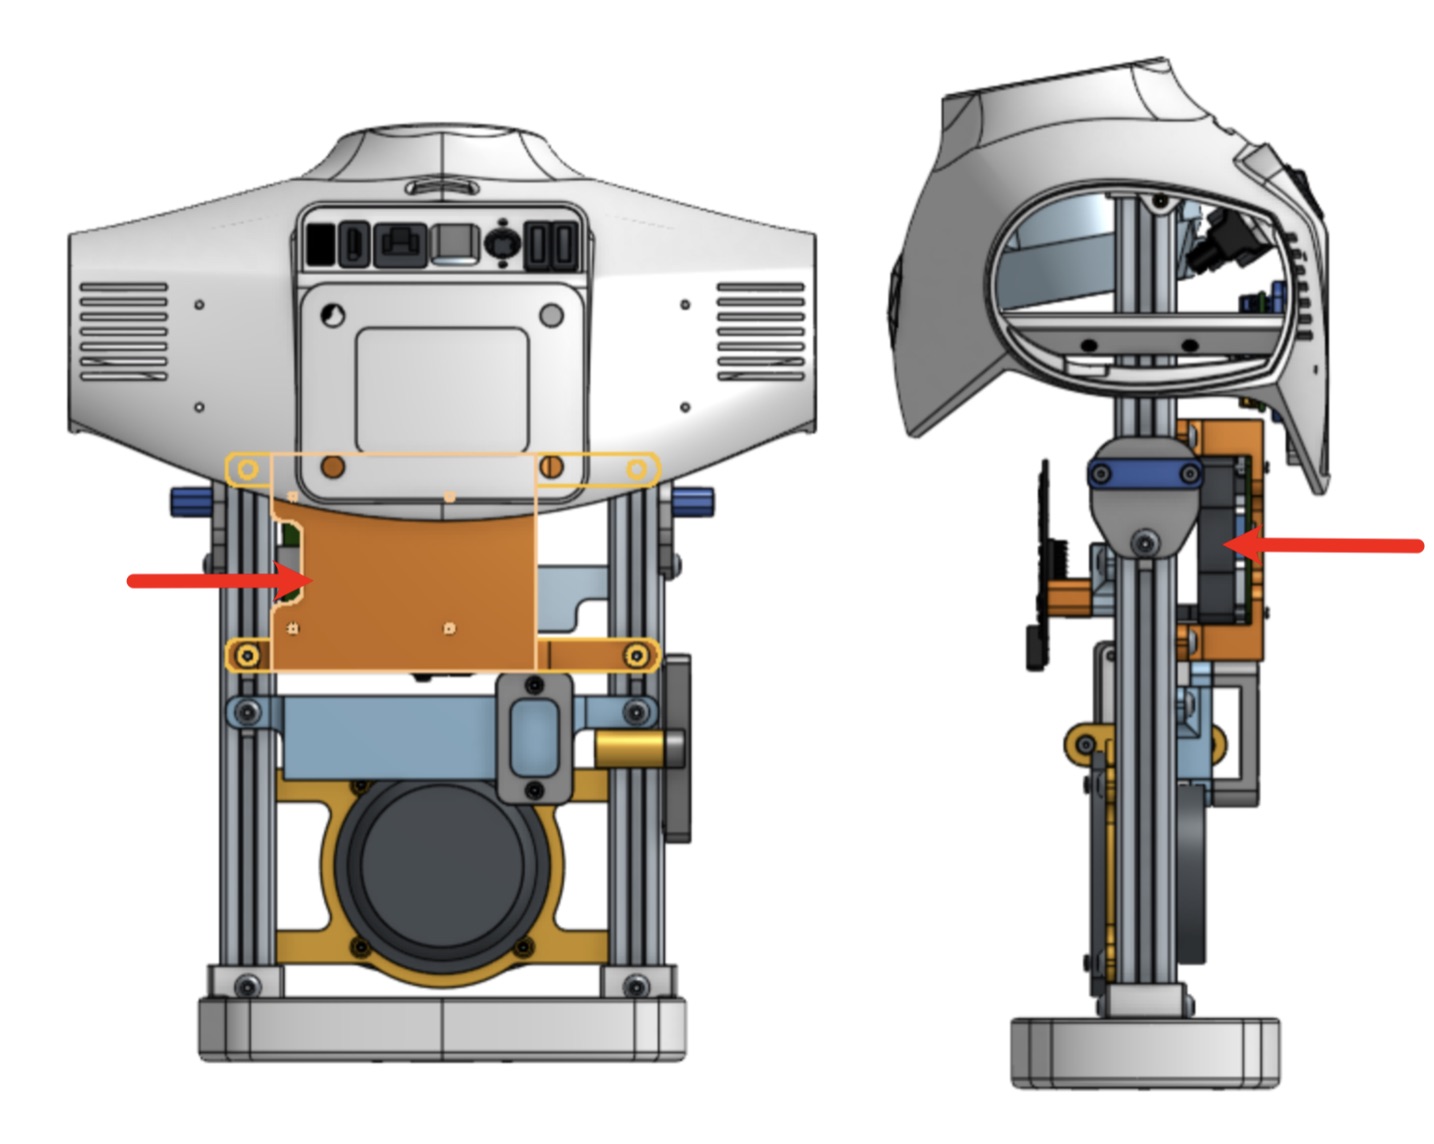
Then, if you want to update or re-install the system, we recommend you to rewrite the whole image. You can use etcher to burn the ISO. You will need a SD-card with at least a 16Go capacity. You can find the latest ISO here.
Backup
Make sure to save and copy your work as it will be lost during the re-writing!
The image is based on the Raspbian Buster OS (desktop version). We then installed our own software, mainly a few Python packages.
Install on your own machine
We provide a pre-install Raspberry-Pi to ensure that all Reachy are shipped ready to be used and with the same configuration. Yet, if you want to use your own computer to control Reachy, or if you want to customize the Raspbian image it is possible. It is a more complex approach and requires knowledge on development environment. Some components are dedicated to the Raspberry Pi (such as the camera and you will have to either use a Raspberry Pi or change the cameras).
What is left to configure is how you want to access your Reachy. There are a few options. We will present the most common below.
Work directly on the robot
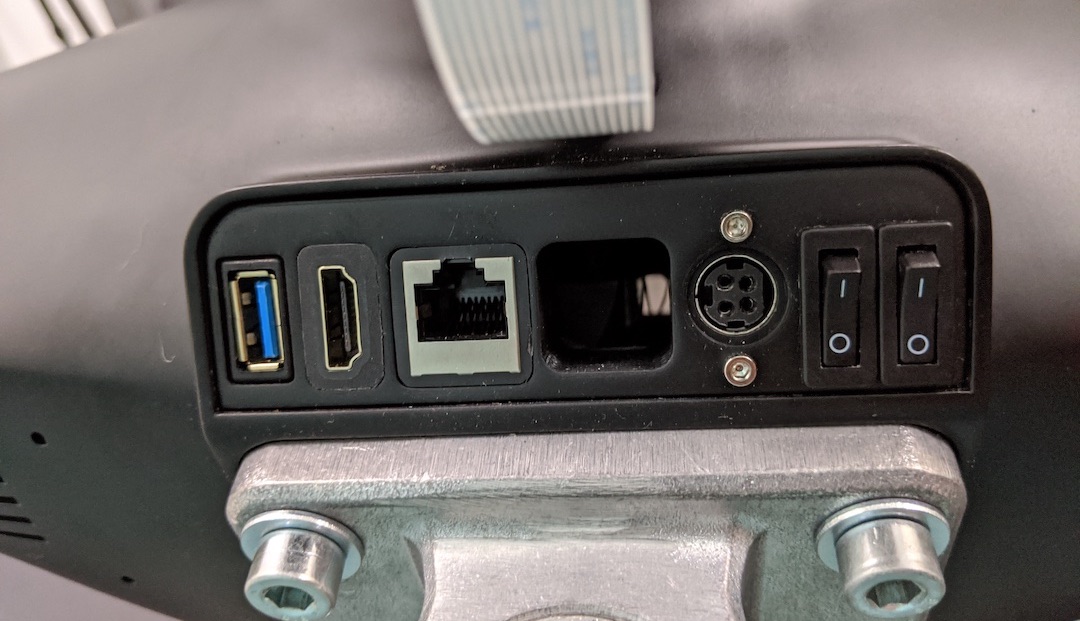
You can directly plug a keyboard, mouse (USB) and display (HDMI) on the back of robot and you should be good to go. You can also plug an ethernet cable.
Login access
The robot comes with the default login: pi and a default password: reachy.
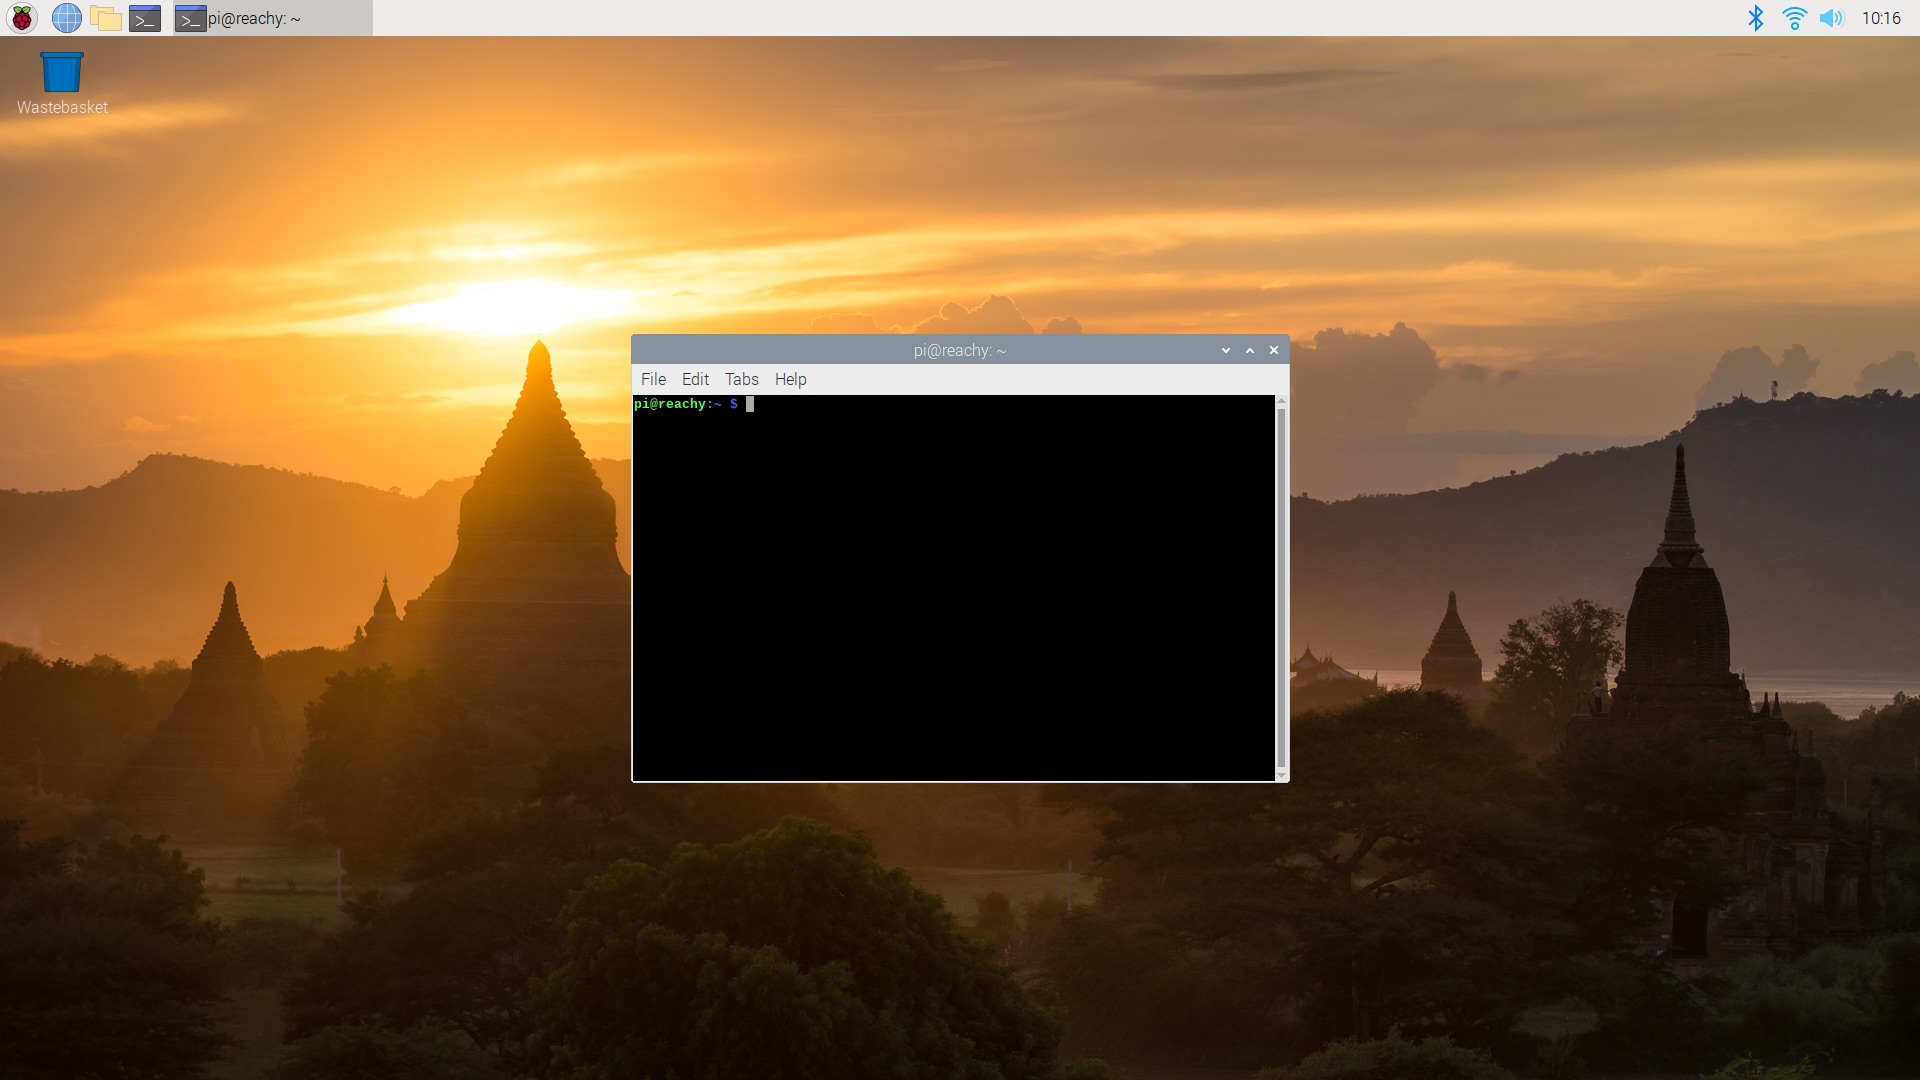
You will have access to the Raspbian GUI where you will be able to configure everything you need (WiFi, ssh access, login, etc). Please, refer to the official Raspberry-Pi documentation for more information.
Connect Reachy to the network
You can also work from your own computer and access the robot remotely. To do so, you will first need to connect the robot to your network.
There are multiple ways of doing that. If you already know how to connect a Raspberry-Pi, you can follow any procedure that you are familiar with. The only modification from a standard Raspbian is the hostname: reachy and the default password: reachy.
Otherwise, we will dive into details below.
Using Ethernet
You can connect your Reachy using the ethernet socket on the back of the robot. Most configuration should work without any additional setup.
Configuring the WiFi
Configuring the WiFi on a Raspberry-Pi for the first time can be a bit tricky. That's why we developed a simple web dashboard to help you do that. Yet, this dashboard is hosted on the robot, so you need to connect to it.
This can be done:
- by connecting once via ethernet or by connecting a keyboard/screen directly to the robot (see above).
- or via Reachy hotspot: if the robot does not manage to connect to a known WiFi network it will create its own access point that you can join. A minute or two after booting your robot, you should see a new WiFi network named Reachy-AP. You can join it using the passphrase: Reachy-AP.
Accessing the dashboard
Once connected to your robot, you can access the dashboard using your web-browser and connecting to http://reachy.local.
Using hostname: Note that to work, we use the mDNS protocol and access the robot via its hostname. This should works without any configuration under Mac OS and GNU/Linux or recent version of Windows 10. If it does not work we recommend you to install Bonjour Print Services for Windows.
Alternatively, you can directly access it using the robot IP address on your network (see with your FAI or IT to get the information). The Find App for smartphone may also help you find it. It is available for Android and iOS. More information is accessible on the Raspberry-Pi official documentation.
When you've found reachy's IP, you can directly access the dashboard on http://192.168.0.42/ where you replace 192.168.0.42 by the found IP.
Setup a new WiFi using the dashboard
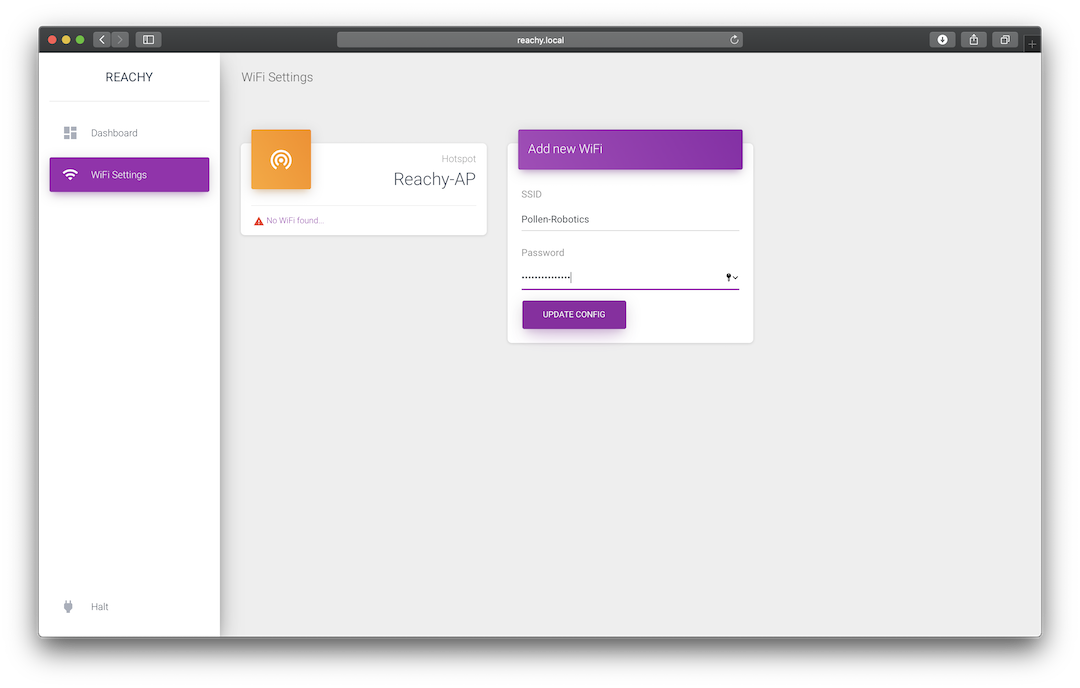
On the left column of the dashboard, you should see a WiFi Settings option. When you click on it, you should see something similar to the screenshot below.
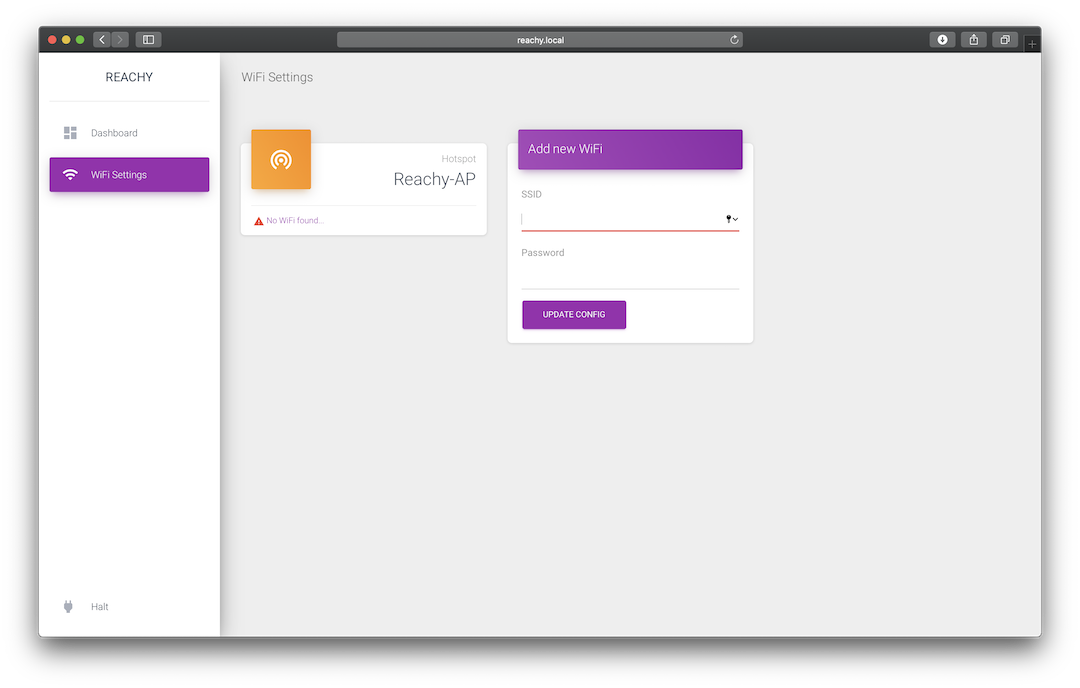
You can see that it's currently on the Hotspot configuration. You can fill the Add new WiFi form on the right, then click on the UPDATE CONFIG button:
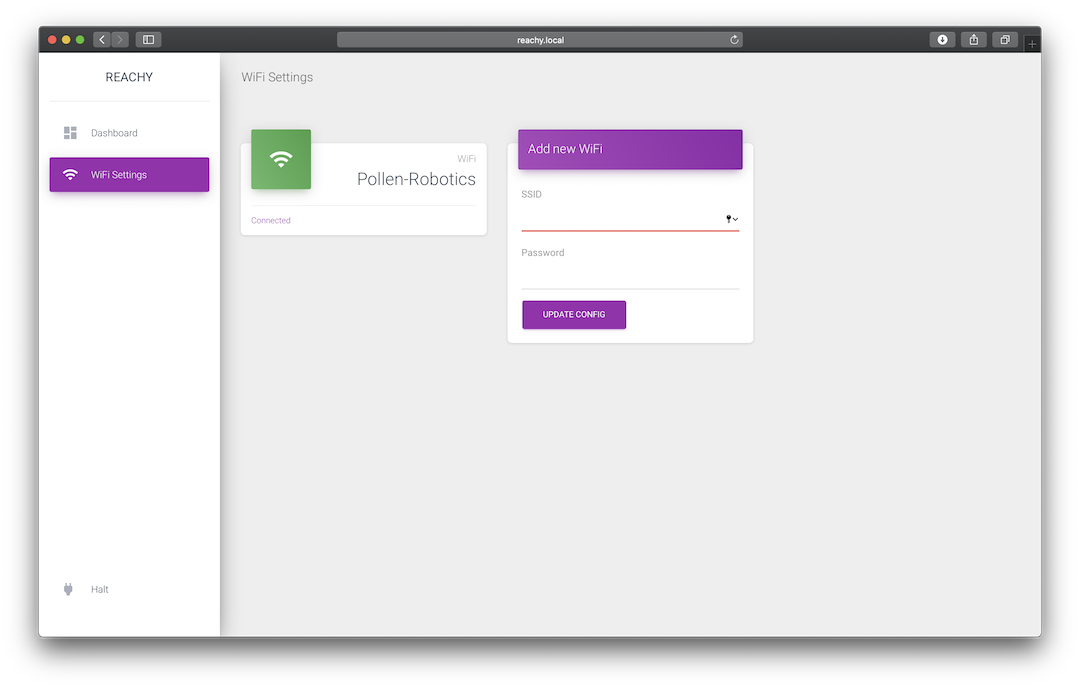
Reboot your robot and it should connect to your freshly setup WiFi. If you come back to the Wifi Settings page, you should now see:
Access the robot via ssh
You can also access Reachy via ssh.
Using the IP
ssh pi@192.168.0.42
Replace 192.168.0.42 with the IP you found.
Using ZeroConf
ssh pi@reachy.local
Note: for information on how to use ssh on your own machine, please refer to the Raspberry-Pi documentation.
Login access
The robot comes with the default login: pi and a default password: reachy. Make sure to change the password if you enable remote access! Or even better, only connect using ssh key.