Connect to Reachy 2
Establish a connection to the robot with the Python SDK
Before you can start sending commands or running code, you need to connect to your Reachy 2. Here’s how to get set up:
Step 1 — Be on the same network
🌐 To communicate with Reachy 2, your computer and the robot must be on the same network. You can do this:
- via Ethernet (recommended for stability), or
- via WiFi (if both devices are on the same WiFi network).
⚠️ Important if using ethernet: Do not plug an Ethernet cable directly between your computer and the robot. Instead, connect the robot’s Ethernet cable to your router or switch, so it becomes part of your local network—just like your computer.
Step 2 — Find Reachy’s IP address
You’ll need the robot’s IP address to connect using the SDK.
⚠️ Note: You can’t use the
*.localhostname to connect with the SDK—you’ll need the actual IP address (e.g.,192.168.1.42).
There are two ways to find it:
Option 1: Using the dashboard
Open a browser on your computer (on the same network as the robot), and goto reachy_name.local:8000/.
Once you are in the dashboard, you can click on Network and you will find the IP addresses of your robot (WiFi and Ethernet).
Option 2: Using the LCD screen
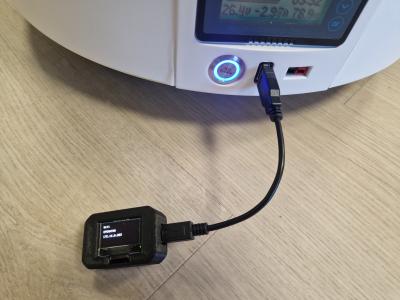
If you are not able to access the dashboard, you can turn off completely your robot. Then, you can plug the supplied LCD screen on the USB port of the mobile base.
Turn on your robot again, and it should display display the robot’s IP addresses (alternately Ethernet and WiFi) :
Step 3 — Connect!
Once you’ve got the IP, you’re ready to connect using the SDK!
You can check that everything is working as expected by running the following Python code in a terminal on your virtual environment :
$ python3
from reachy2_sdk import ReachySDK

# Replace with the actual IP you've found.
reachy = ReachySDK(host='the.reachy.ip.found.')